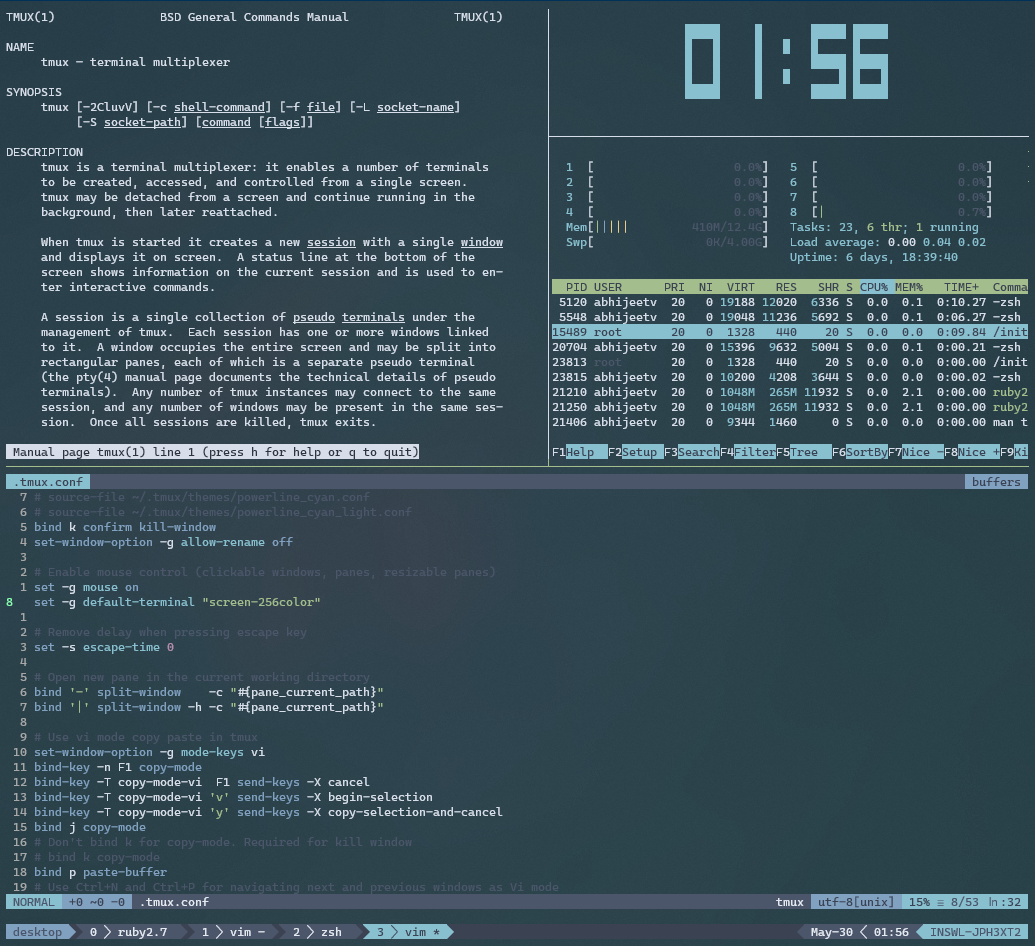
Tmux, like the Vim editor, is one of those tools in a developer’s arsenal which can be intimidating at the beginning but becomes indispensable once you start using it.
Tmux is an acronym for Terminal Multiplexer. It “multiplexes” your terminal and allow you to create multiple sessions, windows and panes within the same terminal. Tmux can elevate your terminal from feeling like an archaic artefact from the ’60s to a modern browser like application with the fancy tabs and panes. It even has support for mouse interactions when you forget the keyboard shortcut for resizing a pane.

While all these fancy panes and windows within a terminal are neat, the greatest attraction for tmux is that all terminal sessions are persistent. This means if you inadvertently close your terminal window when your 2-hour long build is nearing completion, a tmux session would retain all processes in the background. You can pop into the session from a new terminal window to pick up on your work. The feature is even more valuable when working on remote servers. The next time you are in a sketchy WiFi network, and the SSH drops every ten minutes while you frantically try to fix a critical bug in a production server, tmux can help you retain your work in remote sessions (and perhaps help retain your sanity as well).
Let’s jump into it.
Tmux is available in pretty much all major package managers. If you have Ubuntu, this is the command you need to install tmux
sudo apt-get install tmuxTo fire up a new tmux session, just use
tmux
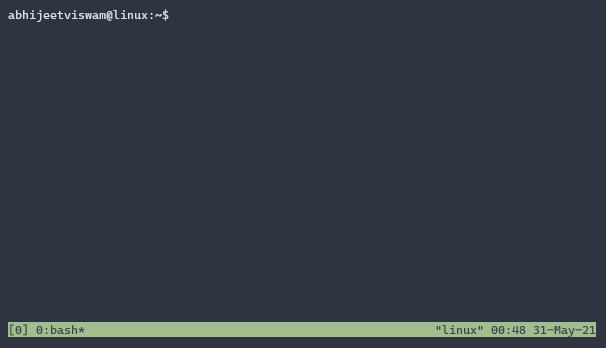
The bar at the bottom of your terminal is the status bar. Out of the box, tmux displays the information about the opened window on the left and some system information on the right. However, this can be heavily customized as we will see soon.
Interacting with TMUX
All interactions with tmux involves pressing a prefix key, followed by a
command key. Out of the box, the prefix key would be set to C-b, which is
shorthand for Ctrl+b. After pressing the prefix key, the next key press would
be registered by tmux and not your shell. For example for creating a new
window, the command is C-b c. So you hit the keys Ctrl+b first and then hit
the c key.
Here are the few important ones you need
| Key Binding | Action |
|---|---|
C-b ? |
Help - Lists all available key bindings |
C-b c |
Creates a new window |
C-b n |
Switches to the next window |
C-b p |
Switches to the previous window |
C-b % |
Splits the current window vertically |
C-b " |
Splits the current window horizontally |
C-b arrowkeys |
Navigate between open panes |
C-b : |
Open tmux command-line |
C-b d |
Detach from active tmux session |

Session management
When you open tmux with the command, well tmux, you are essentially creating
a new session of tmux with one window. Here tmux is naming the session for you,
which would just be a number starting at 0, incremented every time a new
session is created. A better way to create a tmux session is by specifying a
name yourself with the command tmux new -s session_name
Inside the session, you can create windows and panes and navigate between them with the commands from the above table.
You can detach from a session using the keyboard shortcut C-b d. Detaching a
session is different from closing/killing a session. All the windows and panes
and the processes running inside each would be still ongoing in the background.
All the sessions running on your device can be listed using the command
tmux ls. This would show the name of session, number of windows open in the
session, time of session creation and whether the session is currently attached
or not.
You can restore a detached session using the command tmux attach -t session_name
Keyboard shortcuts are the most common mode of interacting with tmux inside a
session. However, tmux also supports a command-line mode, which is invoked by
C-b :, which can be used for more complex operations. For instance, if you
want to swap the first and fourth windows, you can hit C-b :, which brings
you to the tmux command-line, where you can use the command swap-window -s 0 -t 3
to swap the windows.
Customizing tmux
Let’s face it, no matter how useful a utility is, we would not be interested in using it (at least initially) if it looks bland and boring. A plain green bar at the bottom of the terminal is pretty much the definition of boring. Let’s change that and spruce it up a little.
All configuration for tmux is handled from the dotfile .tmux.conf, typically
installed in the $HOME directory. To spice up the appearance of tmux, we need
to add new themes in the configuration file.
But before we add any theme, it is best to add the Tmux Plugin Manager first. Although, it is possible to directly add any themes without the plugin manager, TPM makes it much more convenient. To install TPM, run the following commands in your terminal.
# sourced from https://github.com/tmux-plugins/tpm
git clone https://github.com/tmux-plugins/tpm ~/.tmux/plugins/tpm
echo "
# List of plugins
set -g @plugin 'tmux-plugins/tpm'
set -g @plugin 'tmux-plugins/tmux-sensible'

# Other examples:
# set -g @plugin 'github_username/plugin_name'
# set -g @plugin '[email protected]:user/plugin'
# set -g @plugin '[email protected]:user/plugin'

# Initialize TMUX plugin manager (keep this line at the very bottom of tmux.conf)
run '~/.tmux/plugins/tpm/tpm'" >> ~/.tmux.conf
Once TPM is installed, just search “tmux themes”, find one which suits your
taste, add the plugin configuration in your ~/.tmux.conf file in the list of
plugins, open a tmux session, hit C-b I to install the plugin, and voila. You
have a fresh new looking tmux. I am currently running the Nord theme
by the Arctic Ice Studio.
set -g @plugin 'arcticicestudio/nord-tmux'Changing the theme is just a tip of the iceberg of tmux customization. The status bar can be configured to display pretty much any information you need it to display. Want to see your battery percentage? You can. Want to see which song is currently playing on Spotify? Done. What if you just want to see a tiny weather icon right in your command line because you are too lazy to turn your head and look out the window? Check.
Customizing the tmux to suite your specific requirement is a whole another world in itself. If you want to try peeking further into the rabbit hole, the github repo awesome-tmux would be a great place to start.

